|
Open the Background image contained in
the zip file, duplicate and close the original image.
I like to duplicate the original layer of the
Background.
Save your image as a psp file with
whatever name you choose and remember to save it periodically as you work.
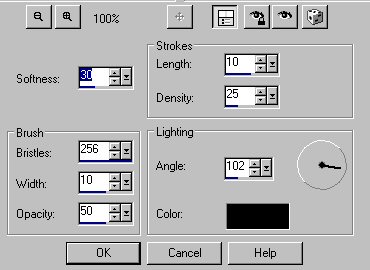
Go to Effects>>>Art Media
Effects>>>Brush Stroke with these settings and click ok.
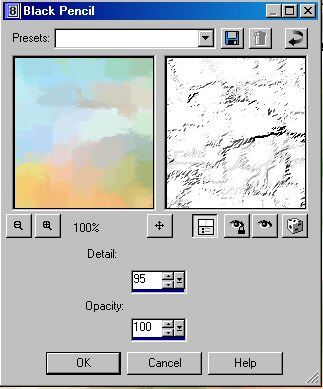
Duplicate this layer and then click on
Effects>>>Art Media Effects>>>Black Pencil with these
settings.
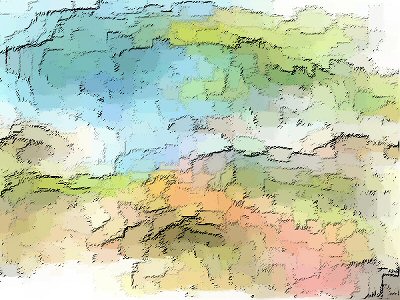
Set the layer blend mode of the black
pencil layer to Multiply.
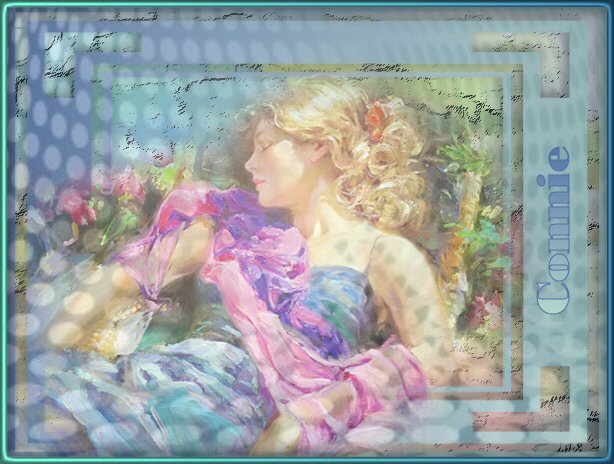
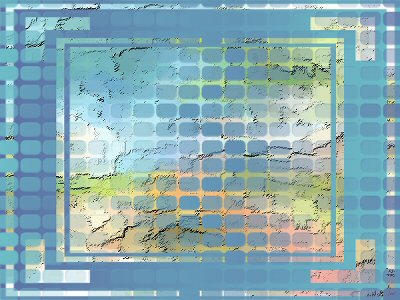
It will now look like this.
Open your woman tube or any favorite
tube that you would like to use
and select your color picker.
Choose two colors from your tube for your materials colors.
Set the top color box to gradient,
with your lightest color in the top box.
Right click on your raster 2 layer and
create new raster layer.
Left click on flood fill tool to fill
the layer with the gradient.
Open the mask 67.jpg and go to
Layers>>>New Mask Layer>>>From Image.
Right Click on the top group raster
layer and create new raster layer.
Open BW mask jpg and then go to your
materials colors and click on the arrow under the top gradient box
so that the gradient is now in the
lower box.
Right click on your flood fill to
flood the layer.
Your image will now look similar to
this, depending on the colors that you chose.
I turned the opacity down to 64 on the
layer with the Mask 67,
but you will need to do whatever
adjustments for your colors.
Copy and paste your tube as a new
layer and position similar to mine in the picture above.
Create a new raster layer and go to
Selections>>>Select All.
Open up your jpg, Circle Shadows,
select copy and then paste into the selection on your new layer
by right clicking on the top bar of
your graphics and selecting Paste>>>Paste into selection.
Make sure this layer is on top, and
set the opacity to 32.
Click on Control D to deselect.
Click on your text icon and then click
on your picture. Select a font that you like. I used Bodoni MT
Black set at size 36.
Make sure your top color materials box
is set to the darkest color and your gradient is in the bottom color
box.
Type in your name and click ok.
Click
Image>>>Rotate>>>Free Rotation and click on Left and 90
degrees and make sure that all layers is NOT checked. Click ok.
Grab your text in the middle where the
cross forms and drag it to the right of your image as in above finished
image.

Right click on the layer and convert
to raster layer.
Go to Effects>>>Drop Shadow,
with the H and V set to 2.
Save file as psp file. Then copy
merged and paste as new image.
Add borders, it may say you have to
flatten the layer, click yes and set borders to 7.
Select magic wand with tolerance and
feather set to 0, and click in border.
Flood fill with gradient.
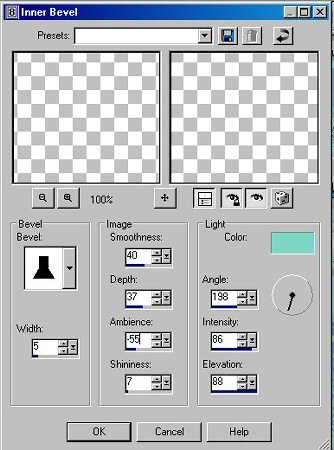
Effects>>>Inner
Bevel>>>3D Effects with these settings.
Then go to Effects>>>Drop
Shadow with the H and V at 2 and click ok.
Go back to Drop Shadow and change the
settings to -2.
Deselect and save your image as a jpg
file.
That's
all folks!! Enjoy!
|